Pages

Thursday, July 31, 2014

Decipher Your Quilt - Circles


I'm back today with another Decipher Your Quilt post. It is my turn to talk about how to decipher circle blocks. 

Jess, from Elven Garden Quilts, and I have found ourselves bogged down in the things that life throws at one over the last couple of months, and so Decipher Your Quilt has been moving at a more than leisurely pace. We do hope to be a bit more predictable in future, with our next post after this one planned for September 18.

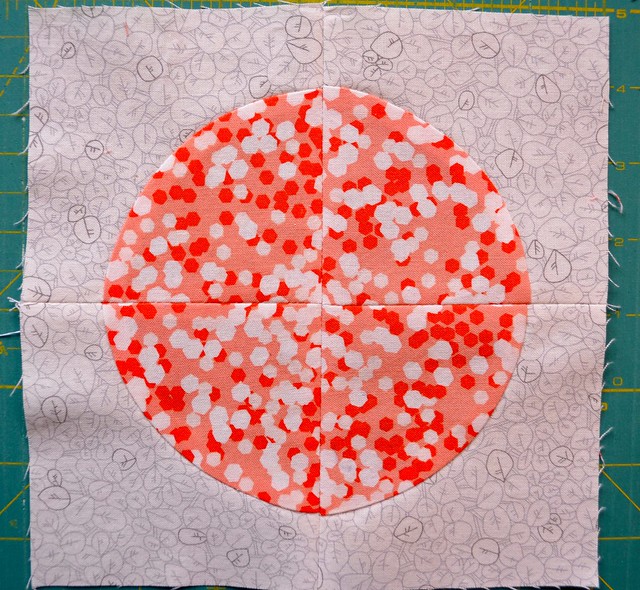
For today, I am going to explain the math behind making a pieced circle block. We figured that it is fairly easy to identify a circle block, even a quarter or half circle block so today the focus is on the tools you need to make your own circle, any size and any time.
Circles - Decipher Your Quilt

***I have made several changes to this tutorial since I wrote it. A dedicated reader emailed me to point out a significant error, thank you! As a result, you will see two different sets of fabrics in the pictures, as I used the best of the photos for the finished tutorial. ***

There are many ways to add circles to your quilts using appliqué (regular, reversed, porthole style, etc.) and the math behind that is simple, make your circle and add it onto, or under, your work. However, when you are piecing circles, you need to understand how to figure out the seam allowances of the interior and exterior pieces.


First, decide what size you want the finished circle to be. For this example, I am going to piece a circle that is 6" in diameter when it is all finished (6" across its widest point, going through the middle).

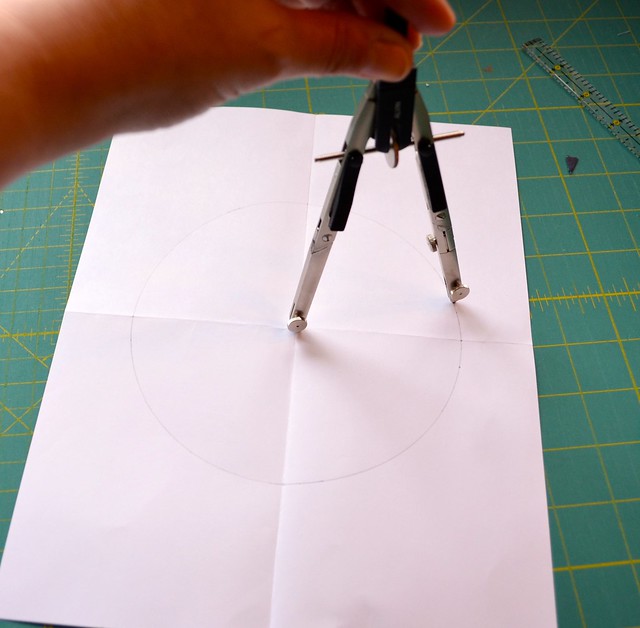
To draw a 6" circle, I get out my compass (that silver gadget in the picture - they are available in geometry sets like the kind you buy for your kids most every year at the start of the school year). I open the compass so that the distance from the point to the pencil lead is 3" - the radius of the circle or half the diameter. I measure my compass on my cutting mat like you see above.

Now, if you don't have a compass there are some options:

  • Search your child's or your friend's child's school supplies to borrow one or go and buy one, they are very inexpensive and a good tool for quilters. For example, they are also helpful when drawing nice circles for appliqué.
  • Find a plate or pot lid or other circle in the size you want to work with.
  • Attach a string to a thumbtack on one end and a pencil on the other. Measure the distance from the point of the tack to the lead of the pencil, with the pencil standing up like the compass arm is standing.
  • Truly, a compass is easier and a good tool to have.

Circles - Decipher Your Quilt

Take a sheet of paper and fold it in half in one direction, open it and fold it in half in the other direction. Open it up so you have the folds as seen in the picture above. Place the compass point at the intersection of the folds and draw your circle which will have a 3" radius and 6" diameter.
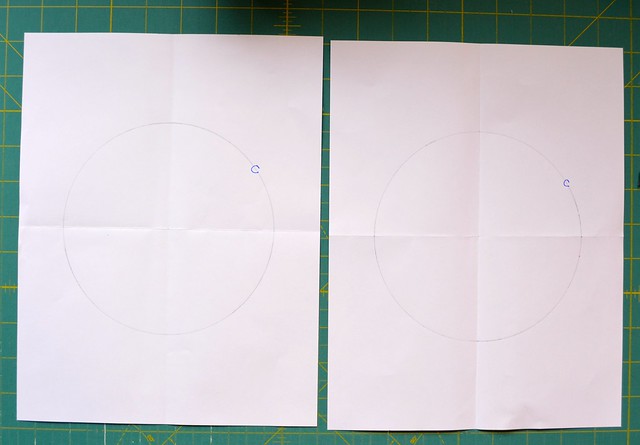
Circles - Decipher Your Quilt

Get a second sheet of paper and repeat. Mark this circle with a C, or write the word Circle with the C being right on the drawn line.
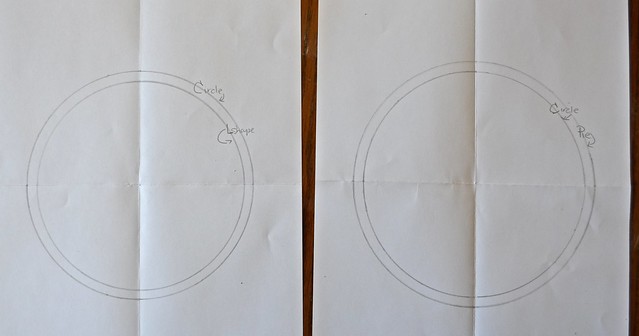
Circles - Decipher Your Quilt

Here is the tricky part. First, adjust your compass to a diameter that is 1/4'' larger then that of your first circle size. For our example that is to 3 1/4" . On one of the circles, place your compass point right at the same spot and draw the larger circle with the 1/4" longer diameter outside the first circle line. Mark that circle as the Pie.

Next, adjust your compass to a diameter that is 1/4'' smaller then that of your first circle. For our example that is to 2 3/4". On the other circle, place your compass point right at the same spot and draw the smaller circle with the 1/4" shorter diameter inside the first circle line. Mark that circle as the L shape.

[Note: if you did not find / buy that compass and you are using the string method, just remeasure your string length instead of adjusting the compass arms. If you are using the pot lid method, then measure 1/4" from your first circle line on either side and mark a number of those points. Once you have several points, free hand connect them to draw out the other circle.]
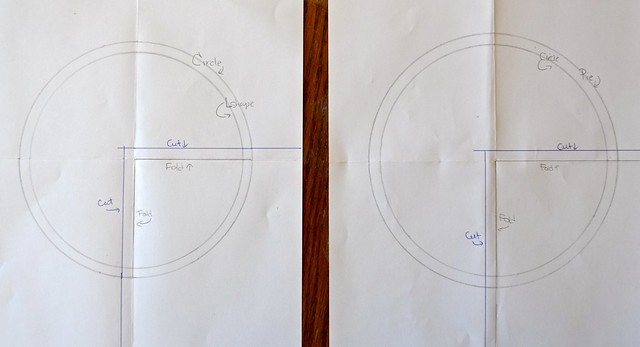
Circles - Decipher Your Quilt

For our example, I am making a pieced circle using what is known as the Drunkard's Path block, which is a quarter circle. The geometry you use to figure out the overlap is the same if you wanted to piece the circle whole or in halfs, but since I like to make circles in quarters, that is what I am showing.

Next we need to add the seam allowances that are needed to piece the 4 quadrants of the Drunkard's Path circle. Using your ruler, measure 1/4" out from both your fold lines on one quadrant of the markings on each piece of paper. You are adding 1/4" to the quadrant defined by the fold lines, so looking at the photo above, add 1/4" to the left of the fold line and 1/4" above the fold line to make the bottom right quadrant larger in each case by the seam allowances required. Label these lines as Cut and draw them out to the edge of your paper.

(*** This is the error I made in the first version of this tutorial. I forgot to add this seam allowance and a lovely reader pointed it out so that I could correct the tutorial.***)
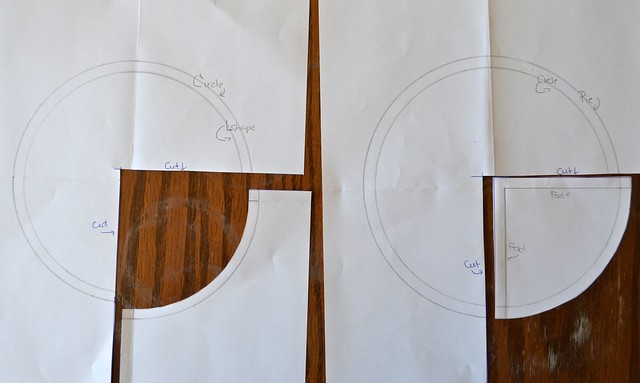
Circles - Decipher Your Quilt

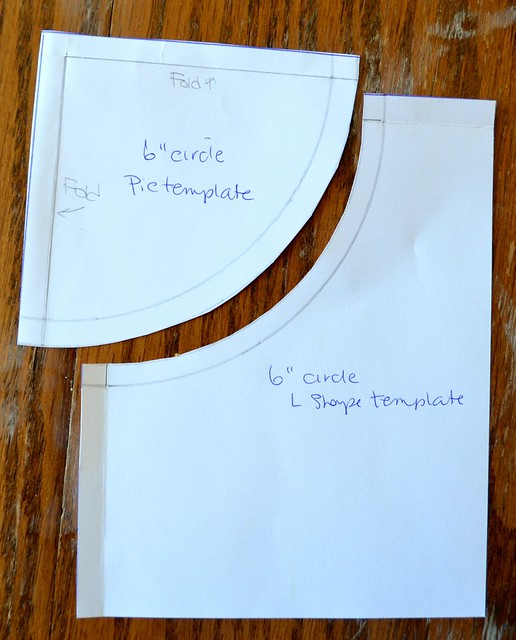
Then, using your "paper" scissors, cut the templates out of each circle, along the cut lines. On the one marked with a Pie line, cut the curve along that Pie line. On the one marked with the L shape line, cut along that L shape line. Both templates will have the original circle line also showing and if it is not, you have cut the wrong line and will have to draw it again.
Circles - Decipher Your Quilt

It is good to label the pieces now. Here is another tricky part and the key to the geometry and math behind piecing circles. Look at the Pie and the L Shape. They do NOT match up - the Pie shape looks longer at both ends and the curves don't fit together. If they match up, you made a mistake.
Circles - Decipher Your Quilt

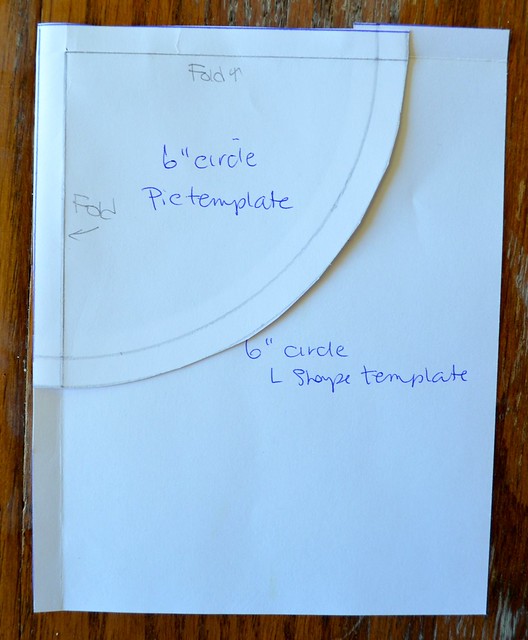
Look what happens if you overlap the two pieces along the first circle line - note that they are overlapping by 1/2". They match up now. The overlapping parts are the seam allowances for each side of the pieces you will sew together.
Circles - Decipher Your Quilt

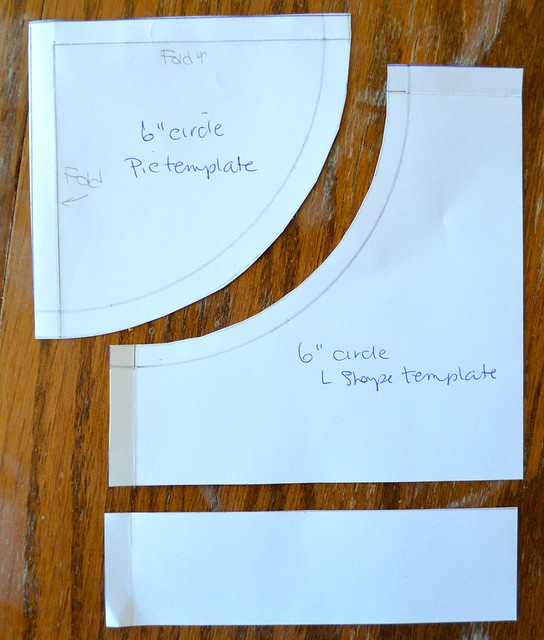
I like to trim my L shape template so that the width at the ends of the L is the same and I piece with a wider L shape than I need so that I have room for trimming.

In the photo I have trimmed the ends of the L shape to 1 1/4" because that is what fit on my paper. This is going to mean that I will end up with an 8 " unfinished block - 6" diameter circle plus 2 times 1" after seaming on each side. If you want the outside of the block to be bigger than what fits on your paper, just tape on more paper on the two straight edges of the L shape and trim to the size you want your block to be plus 1/2" for seam allowances.
Circles - Decipher Your Quilt

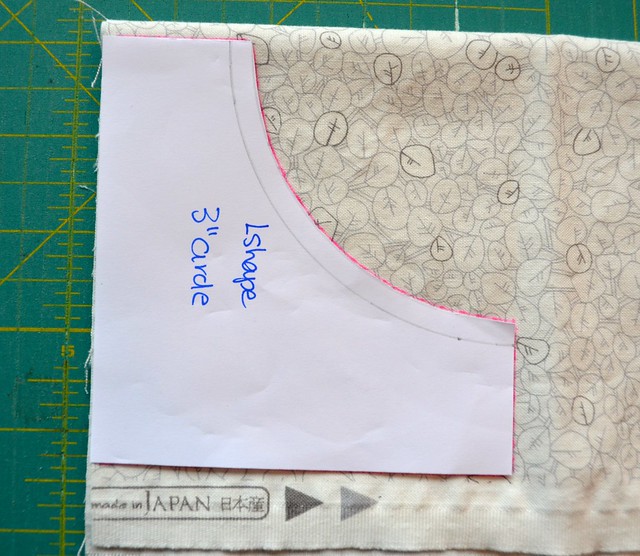
For a circle, you will need 4 L shapes and 4 Pie shapes. To save time, I generally fold my fabric into 4 layers so I can cut out all 4 of each piece at once. I trim one edge nice and straight. Lay your L shape onto the fabric with one of the lines along that nicely trimmed line. Since these are paper templates, DO NOT try to cut along them with a rotary cutter as your fingers will be in grave danger. Instead, get a marking pen or pencil and trace around the edge of the template.
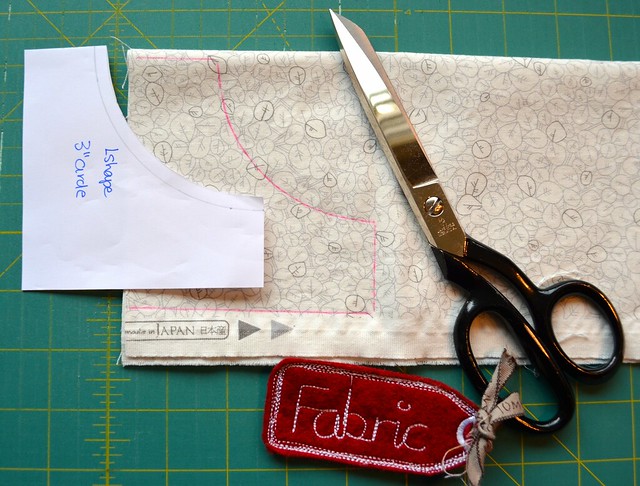
Circles - Decipher Your Quilt

Then holding all four layers together carefully so they don't shift as you cut, and using your fabric scissors, cut out the fabric along the traced lines. (Isn't that fabric tag lovely, it was a prize from the wonderful Benta and it keeps my entire family from wrecking these lovely sharp scissors.)
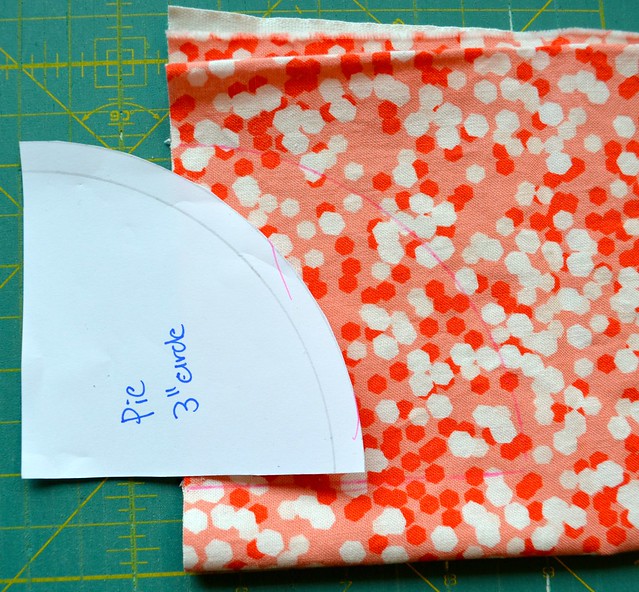
Circles - Decipher Your Quilt

Repeat the same procedure for the Pie shaped template.
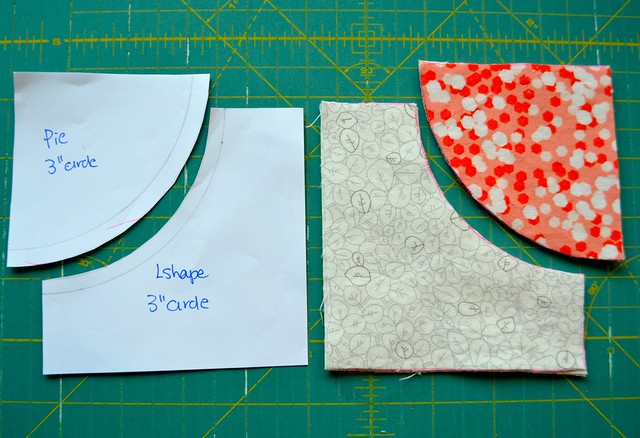
Circles - Decipher Your Quilt

You can see that it seems unlikely that this is going to work out.
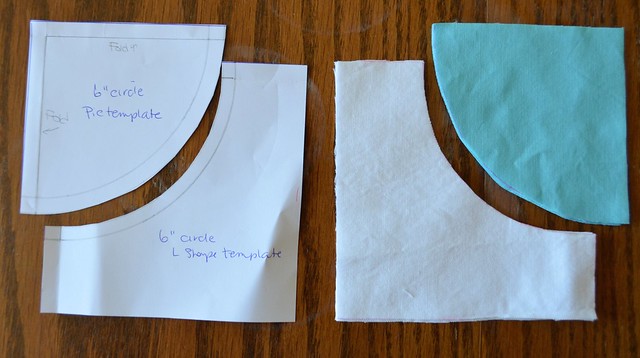
Circles - Decipher Your Quilt

Even when you cut the fabrics with the correct templates, it still looks like an unlikely proposition.
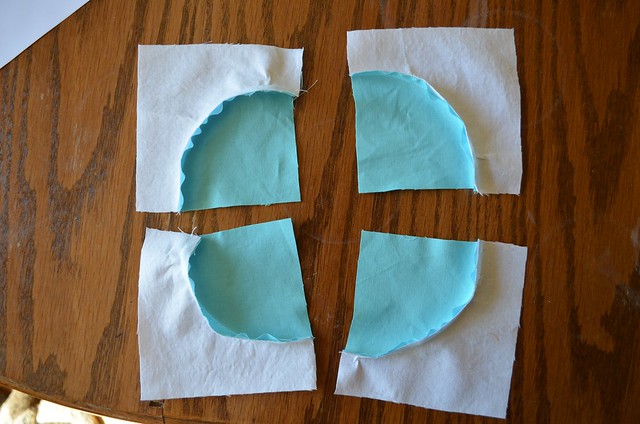
Circles - Decipher Your Quilt

Piece the Pie shapes to the L shapes. There are many ways to do this, with pins, without pins, with one pin, with glue basting, and with special sewing machine feet. I recommend that you watch my 1 minute 18 second video which is referenced in the blog post here and give my no pins, no fancy equipment, method a chance. Most folks who do are chain piecing these circles in no time. However, if you google piecing drunkards path circles, you will find many helpful tutorials for every possible piecing method and find the one that works best for you.
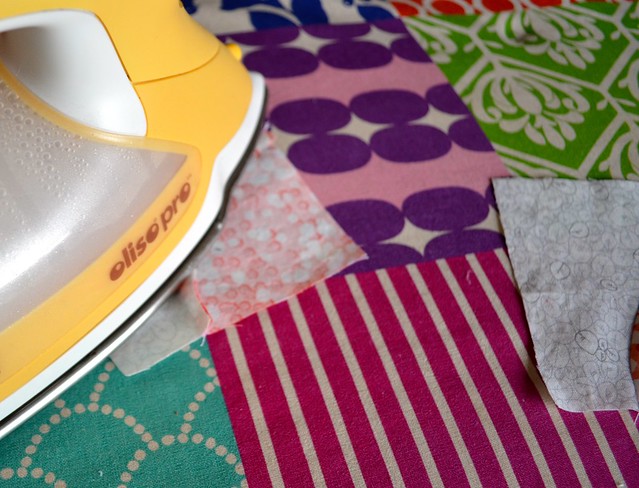
Circles - Decipher Your Quilt

Remember that you cut both the L shapes and the Pie shapes on a curve so those are bias cuts. The pieces will easily stretch along them. Press them gently and carefully. I press the back seam towards the Pie shape.
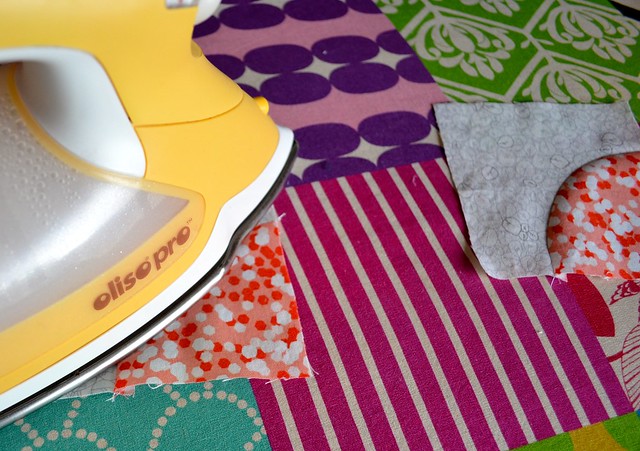
Circles - Decipher Your Quilt

Press the front carefully too, watching to avoid any bulking up along the sewing line.

Now, when you do a lot of these, eventually you are able to piece them without much, if any, need for trimming. But, like making HSTs, the pieces benefit from some trimming, especially if you started with larger L shapes than you needed. I decided to trim these pieces to become 4 1/4" squares, again so that my unfinished final block would be 8". [Note: if you want the L shape to disappear at the edges of the circles, you would trim the L shape to be just 1/4" at the two ends of the L.]
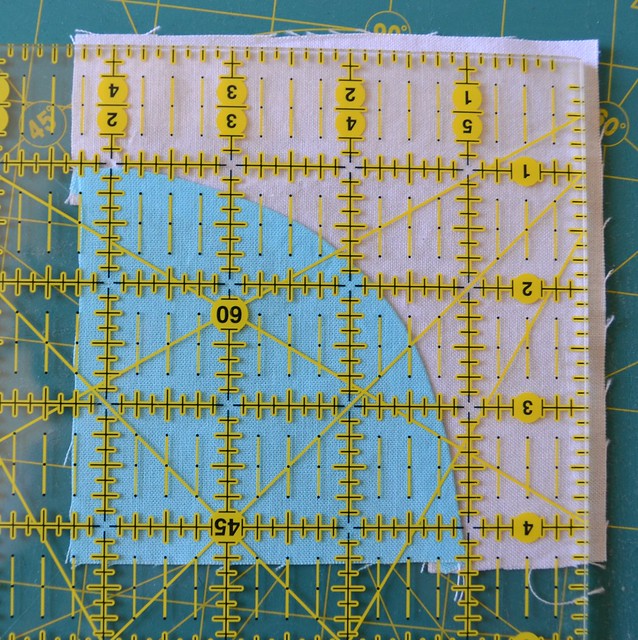
Circles - Decipher Your Quilt

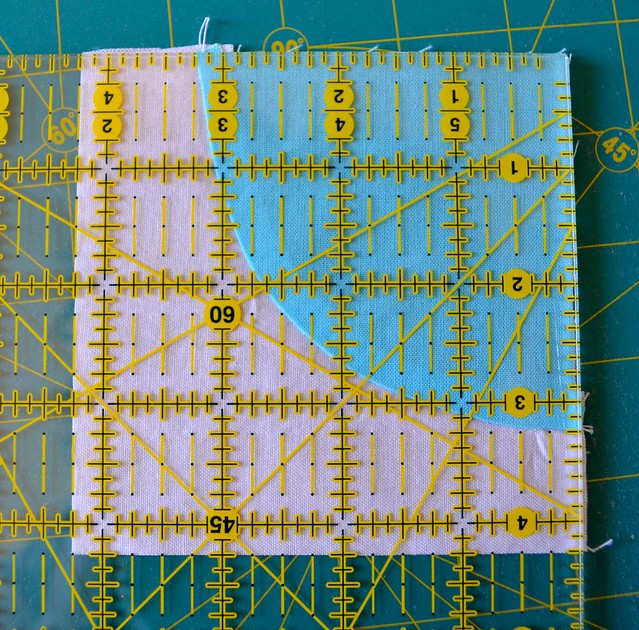
Here is another tricky part. Watch the placement of your trimming ruler so that the radius is not shortened by this step. We had a 3" radius for the original circle we drew and we added 1/4" for the seam allowance. That first circle line we drew was the stitching line.

Look at the photo above. As we need 3 1/4" of radius - blue fabric - for the pie shape, place the ruler so that both of the two ends of the blue pie shape are 1" in from the edge of the L Shape. Then make sure that there is 3 1/4" of blue available to trim at the corner of the pie shape. Trim off the excess L shape fabric.
Circles - Decipher Your Quilt

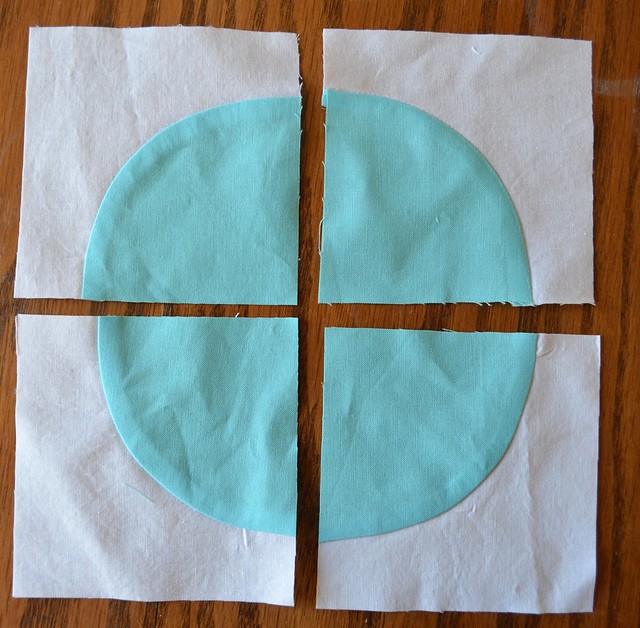
Flip this unit over to trim the other side. Line up the outside of the L shape to the 4 1/4" marks, note that the ends of the pie shape both hit the 3 1/4" mark, and then trim the two outside edges.
Circles - Decipher Your Quilt

Repeat for all 4 quarter circle units.
Circles - Decipher Your Quilt

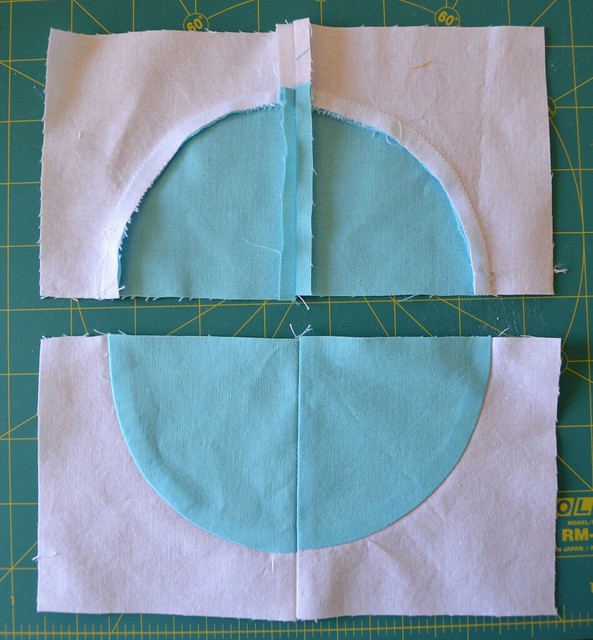
Piece two quarters together and repeat. I press the seams of circles open and it is worth stopping to press at this point.
Circles - Decipher Your Quilt

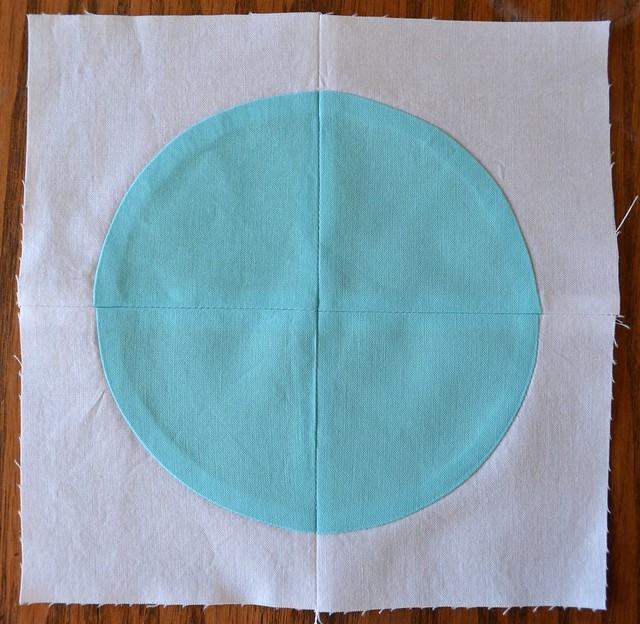
Piece together the two halves of the circle. I generally match the seams at the centre of the circle in priority to matching the edges, although I try my best to get them both to match and ease a little as I sew the seam if need be. You can see from this sample that the seams are not perfect but they are very close. Once the quilt is quilted, this amount of imperfection generally is not noticeable and it is totally gone after washing. If you are bothered, sew a short basting stitch at the edges where the edges of the circle meet, then line up the middle seams and ease any bulk in as you go.

There you have it, the geometry and math behind pieced circles. Now you can make one any size, without any instructions or anyone else's templates. Before you say, I can't, or it does not make sense, consider giving this a try, just as I have written it out. Some of this geometry is better understood once you actually do it once or twice before you ask too much. And then let me know all your questions. If there are lots, I will do a follow up post addressing them.

I also assure you that sewing these curves gets easier quickly if you just practice a little, so don't let the curved piecing stand in your way from adding pieced circles into your quilt.

Jess, from Elven Garden Quilts, and I will both be back with the next instalment of Decipher Your Quilt on September 18 - unless a supplemental circle post is needed in the meantime.

Best,

Leanne

Wednesday, July 30, 2014

Thinking about my blog at the beach


On Sunday we went to one of my favourite public beaches. There is this massive shallow bay so when the tide is out, it is way, way out. When it comes in on a sunny day, the water is quickly warmed by the warm sand and it is like swimming in a nice warm tub. There were a lot of people there, but that did not prevent me from taking a few photos with almost no one in them. This beach is at Parksville, B.C. which is on Vancouver Island in Canada. Those mountains, the ones behind the island in the foreground, are on the mainland, a ways north of Vancouver.


I've been thinking a lot about this blog, and I wanted to share some of the changes I am going to make - they are not big changes but you might notice. First, I wanted to do a bit more in partnership with my blog sponsors without changing the fact that this blog will always focus on my quilting journey. However, I don't post as often as many of my blogging friends, and I thought I could take advantage of those empty days  to post some sponsor stuff.

So here is what you can expect to see. I have offered my sponsors a chance to have a give away once ever quarter on the blog, at their often. These give aways will generally start on a Monday (but not every Monday) and run to Thursday morning with a post on Thursday night to announce the winners. I am also going to do a post every Friday - I think I will call it "If you want to shop" (but I am open to title suggestions) with sponsor news - sales, discounts, new products, events, etc.

These two new regular posts will not change the number of my regular quilting posts but will hopefully give readers and sponsors a chance to connect better, achieve bargains, and win or give away nice stuff.


The other thing I have been thinking about is what else you might like to see happening in this space. Jess and I will be finishing up Decipher Your Quilt over the next few weeks, on our totally laid back and unpredictable schedule. Beyond me sharing my quilting ups and downs, ideas and new patterns, would you like me to do something more - a regular link up, another semi-regular quilting series (I keep thinking a tips and tricks series would be fun, for example), or something else?

I'm off to the big island again today, but I'll be quilting tonight. If you have not yet entered the draw for Jess's pattern, go here to do so. It is a lovely pattern, as is she.

Leanne

A pattern give away!


My friend Jess, from Elven Garden Quilts has given me a copy of her new pattern, Block Flower to give away to one of my readers. This is a fun and fast fat quarter friendly pattern which is great for showing off larger scale prints.

Jess is my incredibly talented and smart partner in the Decipher Your Quilt project, which has been moving slowly this summer - there will be a post about circles on Thursday this week and then we are off for another month until September 18. We did not think you would mind getting the quilt math in slow doses while we cope with the stuff that life throws at us. But I digress.

Jess's pattern testers did great work and you can see many different and beautiful versions of this lovely pattern on Jess's blog here. Go and have a look and then come back here, I'll wait. You can buy a copy of this pattern for the next two weeks at 50% off in Jess's Craftsy shop, here. If you buy one now and then win a copy, Jess will happily refund you your purchase price.

To enter the draw to win my copy of the pattern, just leave me one comment per person on this post letting me know if you are making quilts these days or working on other things. I will keep the draw open until Thursday noon and announce the winner on Thursday evening. If you win, you could always start working on this pattern for the weekend.


Courthouse step block

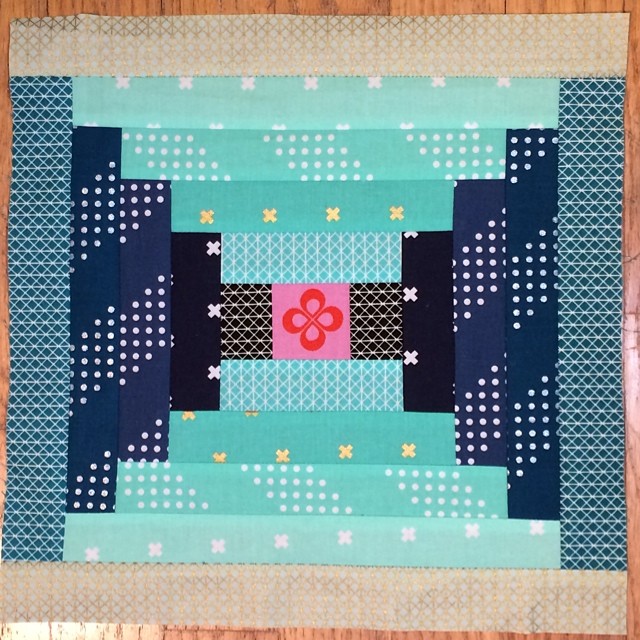
And just a short update on my own sewing. Tonight I made that courthouse step block from some Cotton + Steel basics fabrics. I am hoping that with some quilting, it will represent the theme urban contrasts for my Four in Art group. I need to finish it before August 1, so you will know soon if I manage to pull this one off. Regardless, it has affirmed my huge desire to make a courthouse step block quilt.

cross stitched flying geese

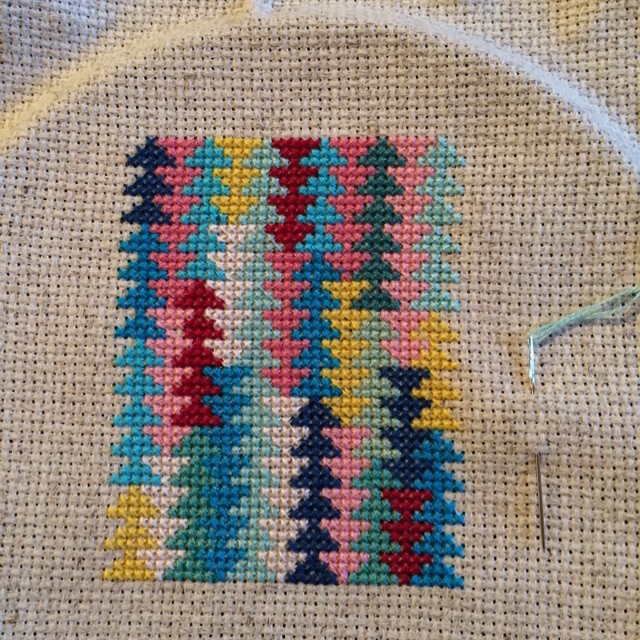
And there are my 11 rows of cross stitch flying geese - which is all the stitched geese there will be. I need to finish this project off as it is due to be mailed on August 4 to my secret partner for the Big Stitch Swap. Right now I am leaning towards finishing it off as a hoop, but we shall see. Those few cross stitched geese (165 geese in total) took me about 11 hours to stitch up, so I am thinking that maybe they deserve to be celebrated as they are. I also think I am a very slow cross stitcher but I love the effect of cross stitched quilt blocks.

So don't forget to enter the draw to win Jess's lovely pattern.

Best,

Leanne
Saturday, July 26, 2014

Some work In progress

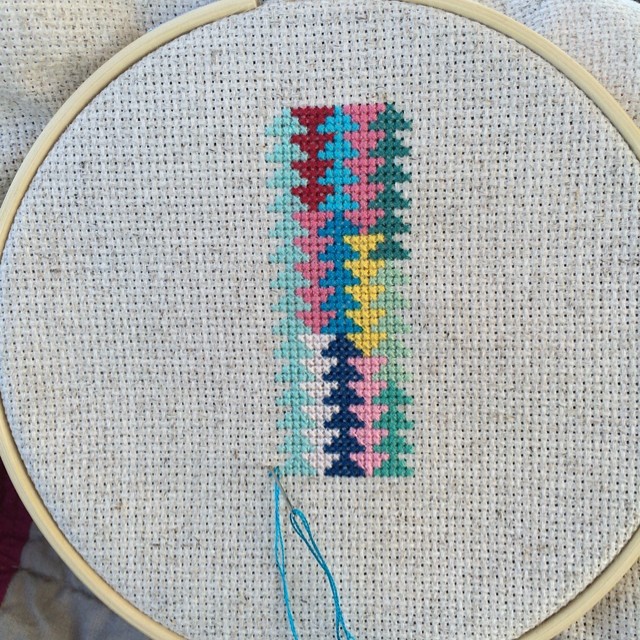
cross stitched geese - in progress

I thought I would talk about some work in progress as things seem to move much slower when I am at the coast and there are no finishes to show off. I am stitching some flying geese for my secret partner in The Big Stitch Swap. I'm still not sure what this will be - maybe a hoop of colourful geese, maybe part of some kind of pouch or bag.  I have a week to get it done before it is time to mail.

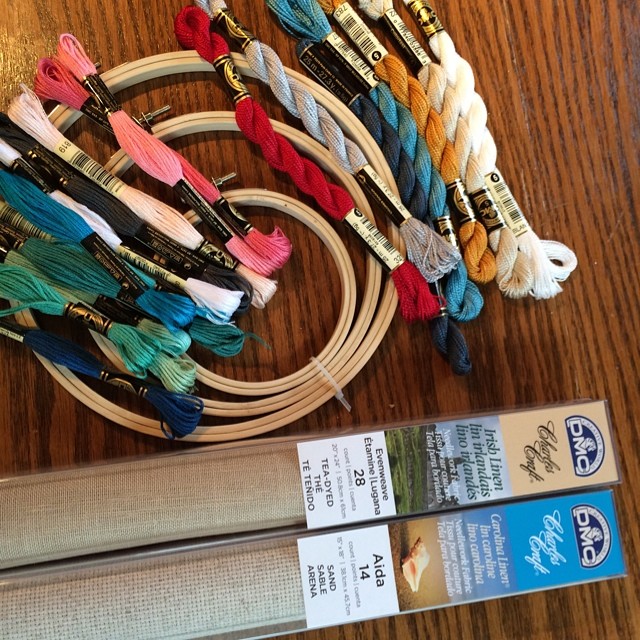
I went shopping for hoops and new threads and linen yesterday. I'm excited to start stitching. #bigstitchswap

You can see my limited colour scheme from the shopping trip last week. I should have bought the 50 colour pack of threads but this felt like a lot. I might get some more tomorrow. It's been a long while since I cross stitched, and it is lovely to be doing it again. It used to be something I was always working on.

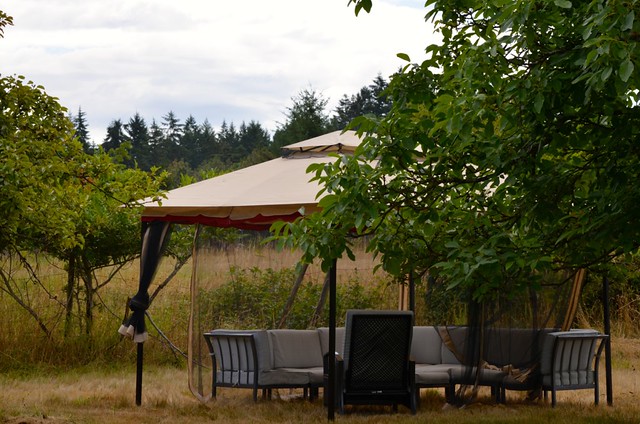
My new gazebo

I've been stitching in my new gazebo. I have already tied up all that netting, it is rather useless as the insects fly in and then cannot leave and it flies about in the wind. But the gazebo is a great place to sit and stitch or nap or read.

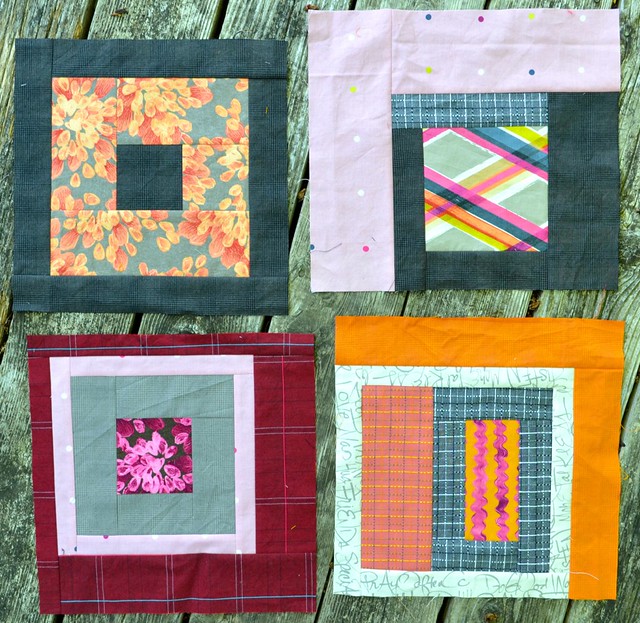
Improv log cabin blocks

At Quilt Market I picked up a bundle fabrics called color:FULL by Jennifer Sampou, which the internet says will not be for sale until October. I so love this group of prints and textured woven fabrics so I decided to make them into improv log cabins which are hopefully not wonky. The picture above shows the beautiful saturated colours.

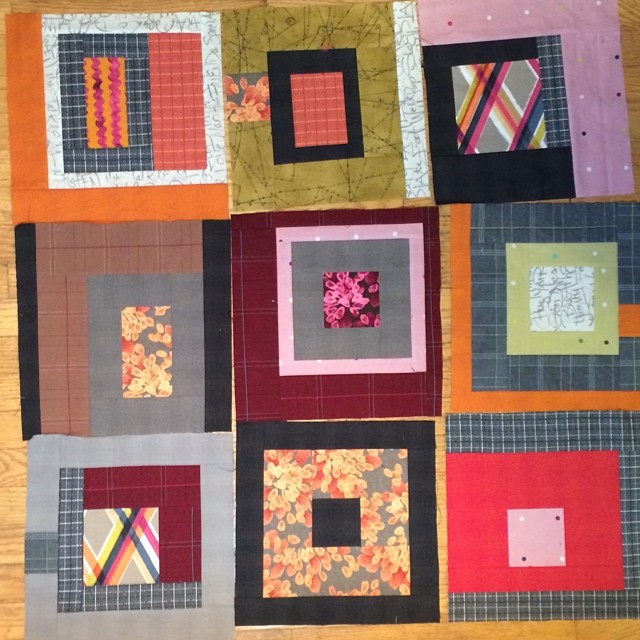
The blocks so far, although the light is poor.

As of tonight I have 9 blocks done, and the light is not great anymore but you get the idea. This is going to be a nice, soft and tactile winter quilt, with an old fashioned air to it. In fact I am imagining it on the sofa in front of the roaring fire in a beautiful log cabin while the snow falls outside. Maybe I am the only one who loves to work on winter quilts in the heat of the summer and dream of living in a log cabin?

Tomorrow is a day at the beach. I think I will take those flying geese along and see what happens next. I hope you are having a lovely weekend.

Best,


Leanne
Wednesday, July 23, 2014

Pointed - Ta Da!

Pointed

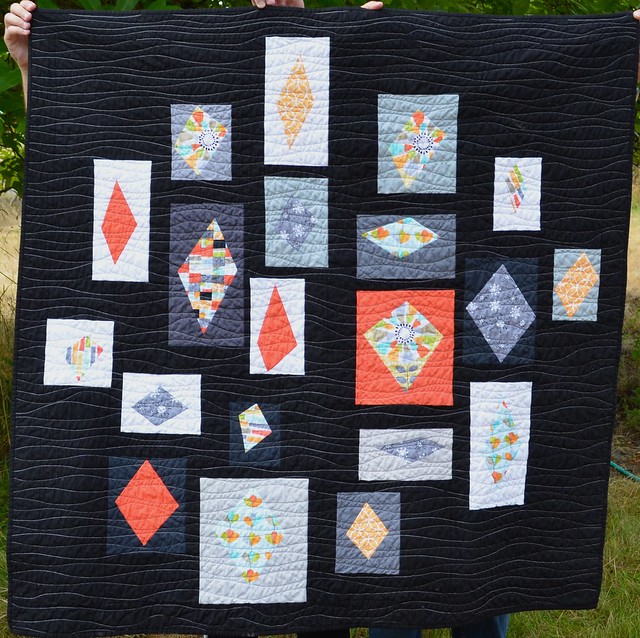
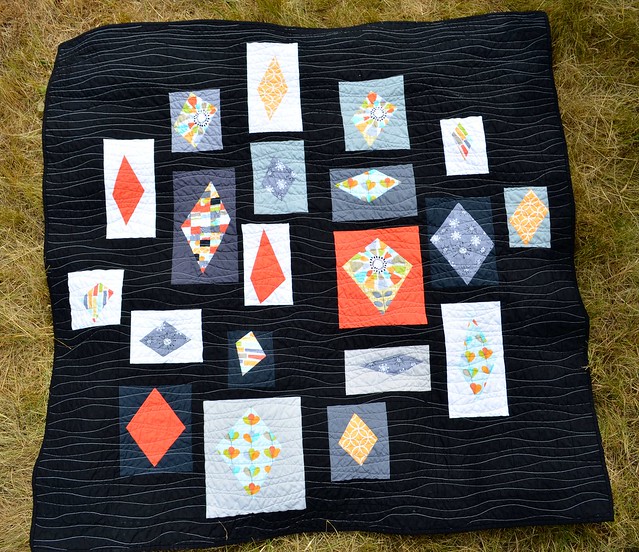
I finished and named this quilt Pointed yesterday. She is 50" square and is made from Michael Miller fabrics and a bunch of solids that were on my shelf. After the helpful input of the Instagrammers, I decided on a black binding to match the sashing. I have to say that working with black is not the easiest thing, but it sure makes the colours pop.

The Michael Miller fabrics in Pointed

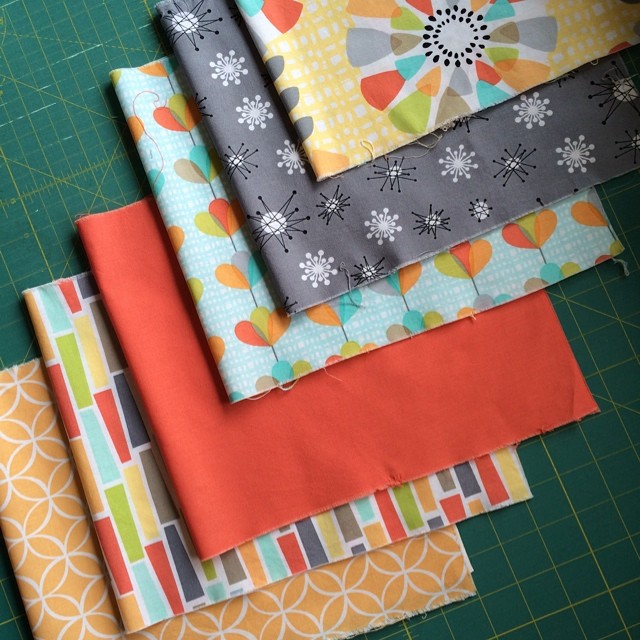
Pointed is the quilt I made for the Modern Quilt Guild Michael Miller fabric challenge. The lovely folks at Michael Miller Fabrics send participating modern quilt guilds and members the above set of fat eights of fabric. The challenge was to make something quilted with them. The rule was that you could add any solid or any other Michael Miller print or solid you wanted to but no other fabric.

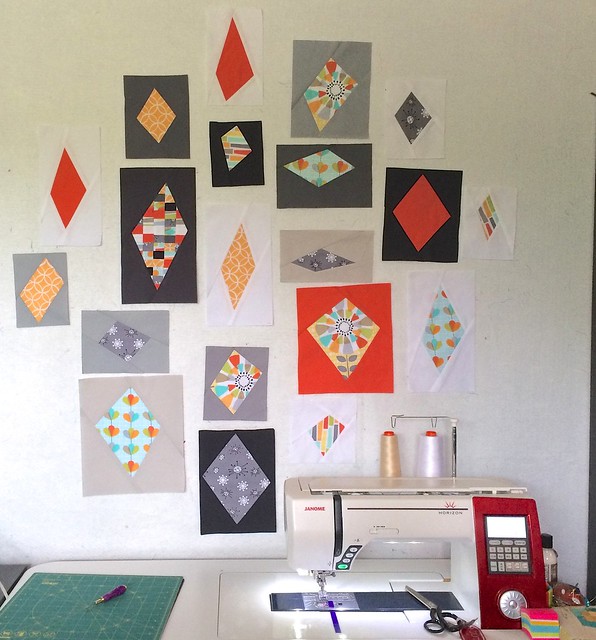
Improv diamonds

I decided to make improv diamonds using a white and grey solids. I trimmed each diamond to a rectangular shape.

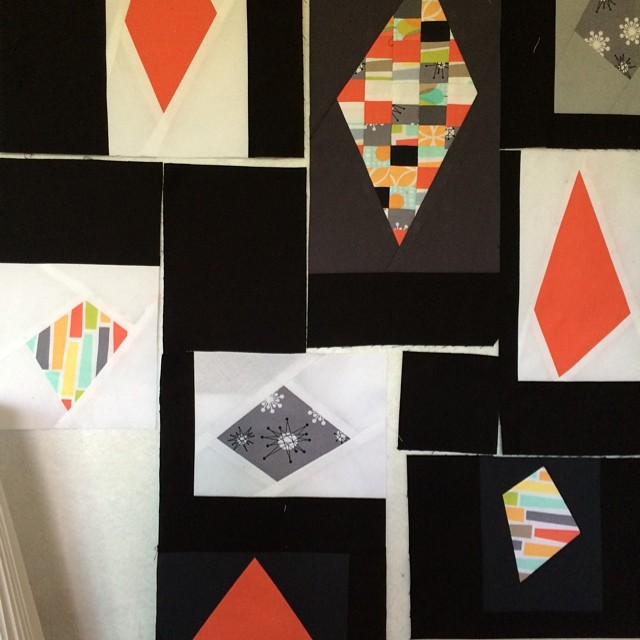
Improv diamond top in progress

I decided to use some Kona black fabric for the background. I laid out the improv diamonds in a roughly diamond shape and then measured and cut pieces to fill in the spaces. There were a few resulting Y seams, which I, invariably encounter when working this way. I like to think they are there to remind me that improv is not that easy.

Pointed

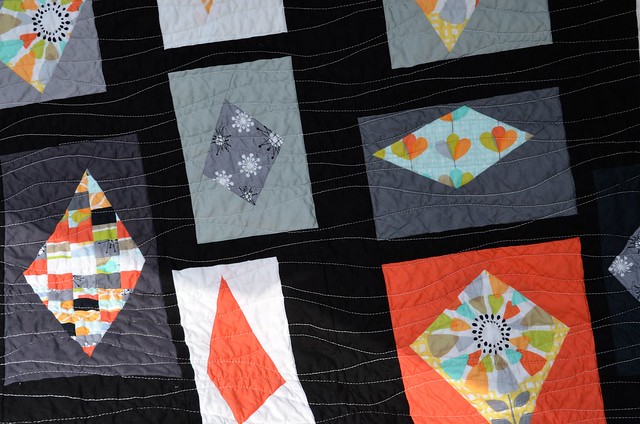
I quilted Pointed with wavy lines using a light grey slightly variegated Wonderfil thread. I wanted the quilting to be a strong feature and to not obliterate the feature fabrics.

Pointed

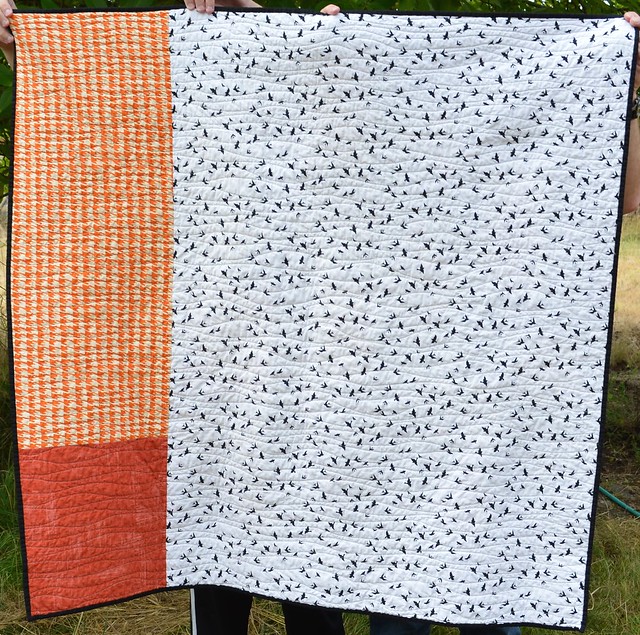
By the time I had the top together, all that black and orange was looking a lot like Halloween to me. So I embraced that theme and picked these Michael Miller fabrics for the back. The oranges are by Laura Gunn and the black birds are by Violet Craft - two of my most favourite fabric designers. This quilt is going to be my fall lap quilt, with just enough Halloween-y feel to it to work.

Pointed

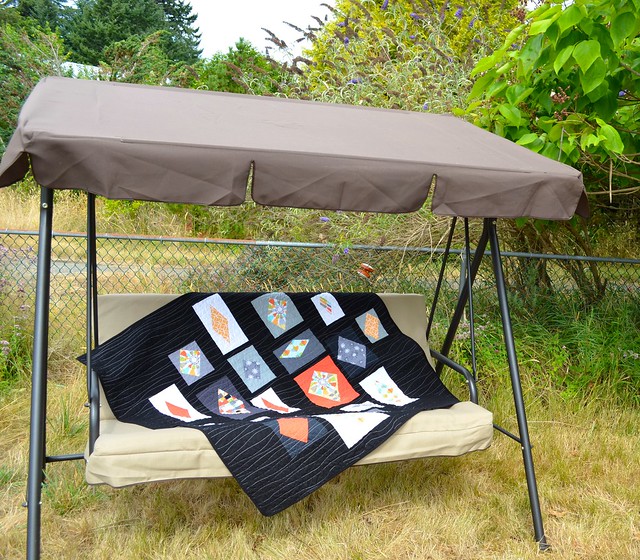
You can see the scale better on my new garden swing - the swing will seat three people. Also, you can see that we are in the height of summer here when the grass turns brown if you don't water it and since water is in short supply on this island, the grass is not watered.

Pointed

The grass is also longish, so it makes the quilt a bit bumpy - maybe more like it might appear draped over a person - when you toss it down but in real life it is square.

Finish Along 2014
A Lovely Year of Finishes

This quilt is also a finish for Q3 of the FAL and my July finish for AYOLF.

Best,

Leanne
Sunday, July 20, 2014

Breathe - Ta Da!

Breathe

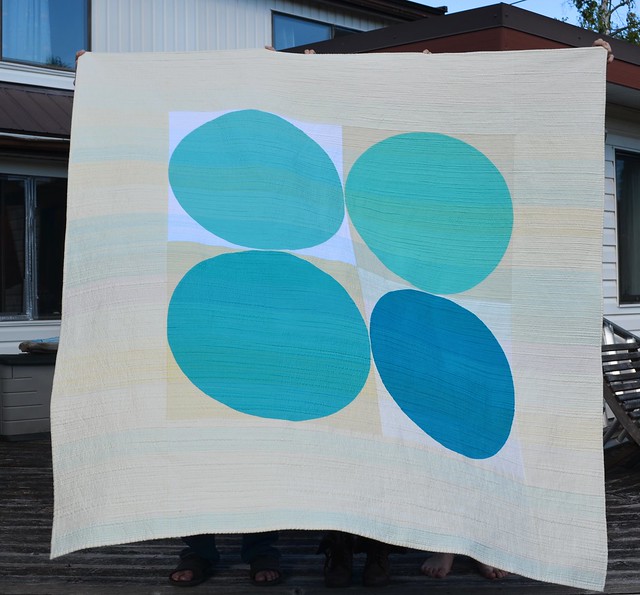
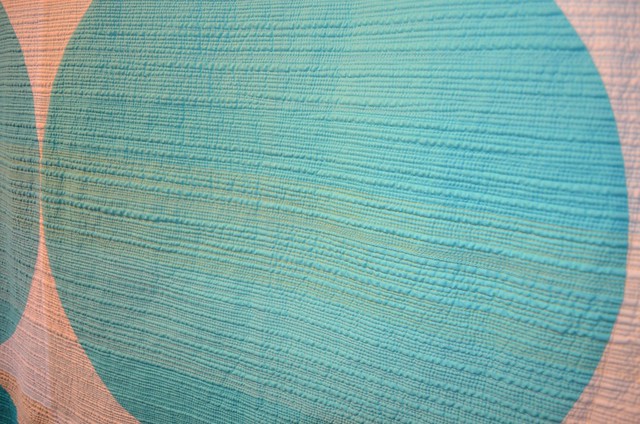
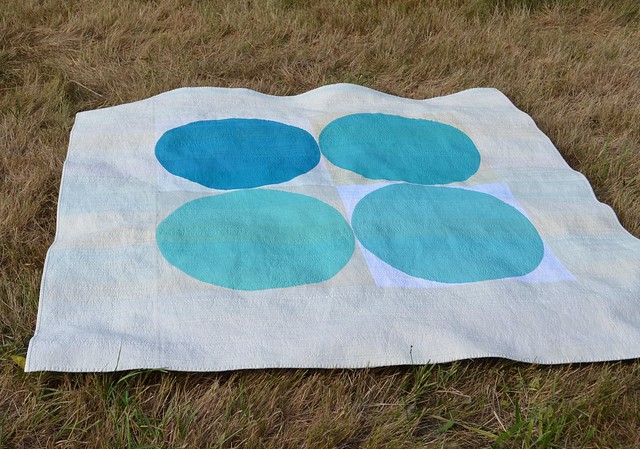
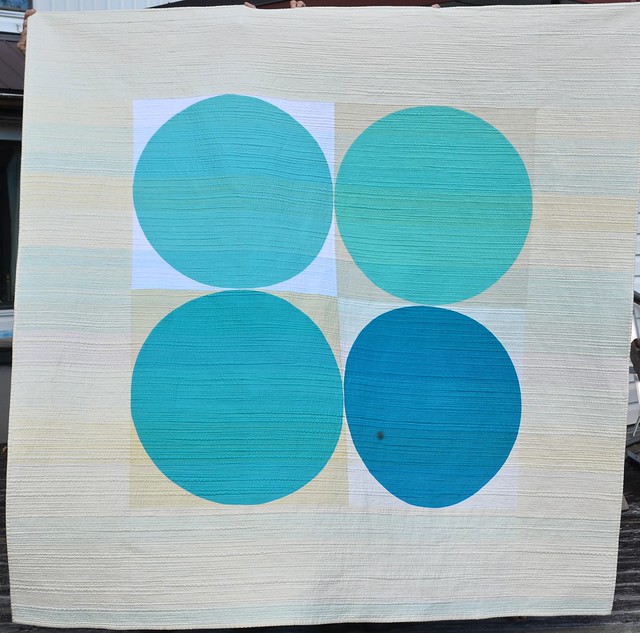
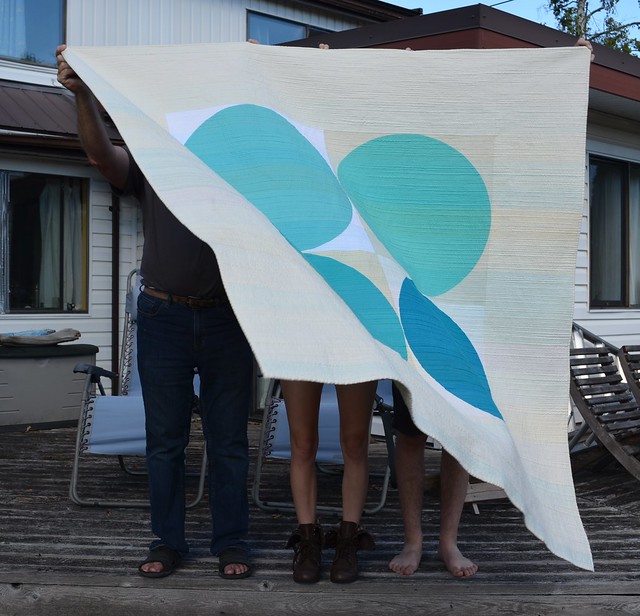
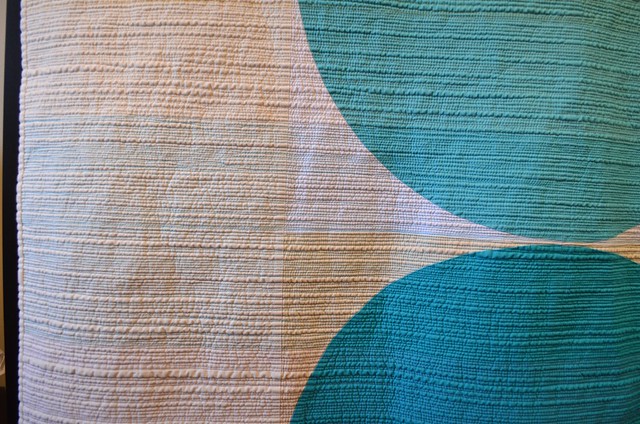
Here is Breathe. She is about 65" square after washing - she pulled in about 5" on each axis when I washed her. She is made from Kona cottons and Essex linen borders and binding. The matchstick quilting was done with Aurifil and Superior cotton threads in various colours.

I quilted her on my Millennium APQS longarm and the lines were all placed freehand without any computer or channel lock assistance. I need to point out that this is not that hard a thing to do on my nicely levelled Millennium as the machine likes to go horizontally. It is more a matter of not "over steering" than anything else to make the lines straight. In fact the harder part is to wobble them every so slightly while keeping the lines really close together for the industrial modern look I am trying to achieve.

Breathe

I was trying to capture the concept of air, breath, calm and lightness. It is only fitting that when I had decent light and enough quilt holders, it was a bit windy.

Breathe

There she is, breathing. And showing off my team of expert quilt holders in their chosen beach footwear.

Breathe

The binding and borders are Essex linen. I think it is my favourite fabric ever. After washing, both the binding and the quilt have the industrial modern - think warehouse loft - texture and feel that I am hoping to achieve. You can also see a bit of the thread colours in this shot. I used whites, greys, blues, yellows, and purples, changing them randomly or when the bobbin was done.

Breathe

Breathe is part of a series of quilts I call my Cycles quilts because the series began with a mini called Cycles. If you want to see them all, check out the My Quilts tab at the top of the blog.

Breathe

While I made this quilt, I was stressed and worried and too busy, pulled in too many directions, and trying my best to manage everything everyone needed. I kept reminding myself to just breathe.

Breathe

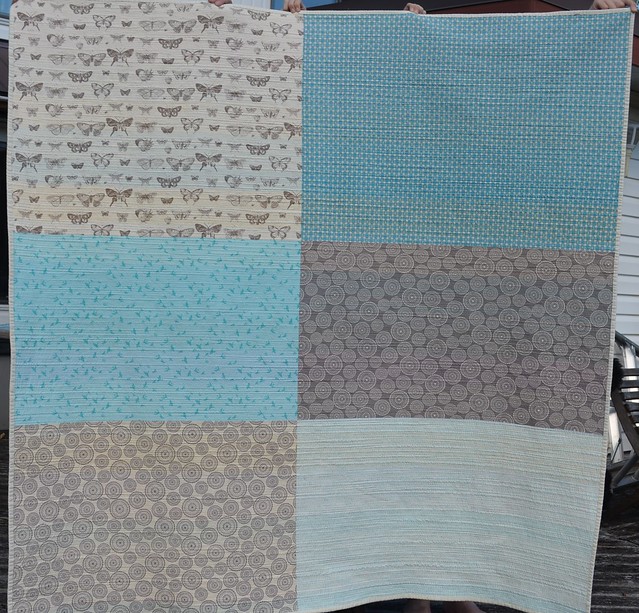
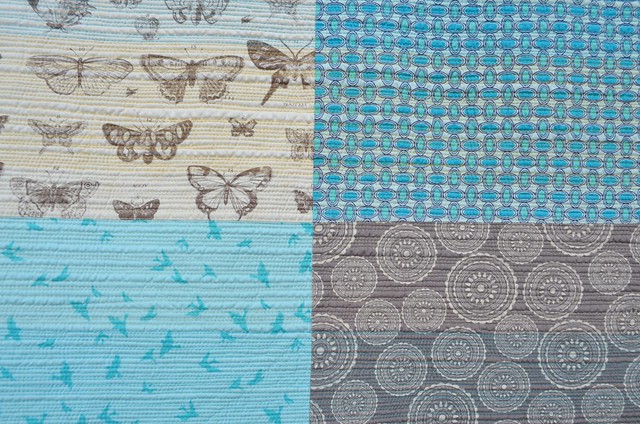
The back of this quilt was pieced to feature fabrics that I had on hand which also evoked the feeling of air.

Breathe

The quilting and the thread changes look great on the back too.


You can see a bit of the yellow thread at the bottom of this photo of the back.

Breathe

Despite the look of the photos, she really is square and flat.


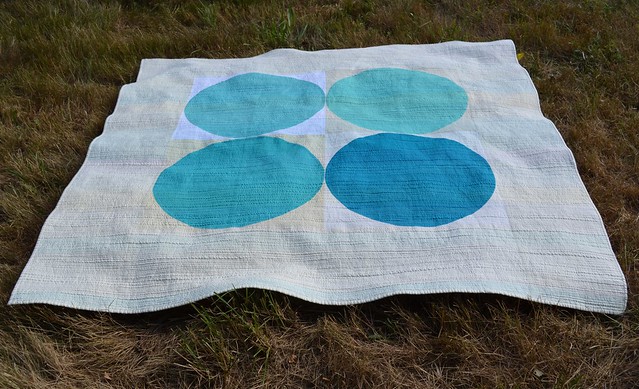
I took that picture above to give you a bit of scale. She is lying on my king size bed below the pillows.

Breathe

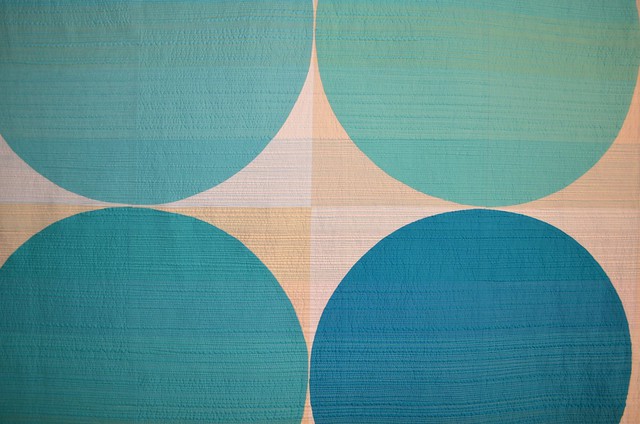
To me the darkest blue circle goes at the bottom right, but I think she looks good from most any angle.

Breathe

I did keep breathing as I made this quilt. The outside forces have calmed for the summer now, and everything got done, all goals were achieved for everyone and we are now left, in my family, to try to just relax, refocus and to breathe, before the onslaught of new challenges in the fall.

Enjoy your Sunday, I plan to be back in this space much more often now.

Best,

Leanne